
Expenses are the costs incurred in managing and maintaining assets or objects in the fleet. These include a wide range of costs such as fuel, maintenance, insurance, taxes, and more.
Expenses are categorised into two types: Variable or Fixed.
- Variable expenses are costs that arise unpredictably or suddenly and do not follow a fixed schedule. The expenses related to accidents, fuel, fines, tolls, and other unforeseen events can be categorised as variable expenses.
- Fixed expenses are predictable costs that occur at regular, scheduled intervals. The expenses include insurance premiums, taxes, and driver salaries, which are incurred consistently over time.
The software allows users to add expenses individually or in bulk. It also offers detailed reports and charts, enabling effective data analysis and informed decision-making for fleet management.
Please Note: The Expense module is available exclusively in the Standard and Premium versions of the platform.
To Get Started
- Log in to your account.
- Go to Settings > Master > Expense.
Upon clicking on Expense, users will be taken to the Expenses overview page, where they can manage and review all their expense details.
Watch : How to add Expense.
To Add Expenses individually
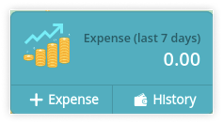
- Click on the ➕ icon on the taskbar below.

-
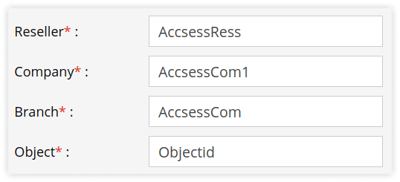
- Choose the appropriate Reseller, Company, and Branch from the dropdown menu under which you wish to add the expense.
- Choose the relevant Object from the dropdown menu for which you wish to record the expense.
-
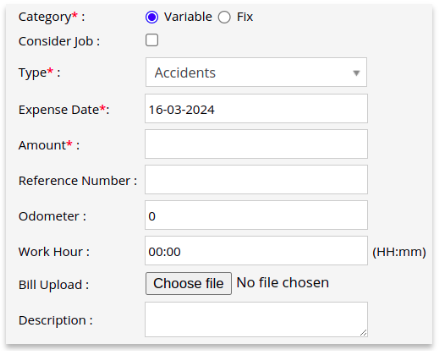
- Select the Category according to the expense type.
- Variable: Select this option if you want to add a variable expense.
- Consider Job: Select the checkbox if you wish to associate this expense with a specific job.

- Job Allocation: Select the appropriate option based on your requirement to choose the job that is in progress or completed.
- Completed Till: If you select the completed option in Job Allocation, please specify the date and time when the job was completed.
- Job: Choose the appropriate job from the provided list.
- Choose the appropriate Type of expense from the drop-down menu.
- Expense Date: Please specify the date of the expense.
- Enter the Amount of the expense.
- Provide the Reference Number for this expense.
- Please provide the Odometer reading.
- Please provide the Work Hour in the format of HH:mm.
- Consider Job: Select the checkbox if you wish to associate this expense with a specific job.
- Variable: Select this option if you want to add a variable expense.
- Select the Category according to the expense type.
The Odometer and Work hour readings will be automatically populated if the relevant configurations have been set for the object.
-
-
- Fix: Select this option if you want to add a fixed expense.
- Fix: Select this option if you want to add a fixed expense.
-

-
-
-
- Choose the appropriate Type of expense from the drop-down menu.
- Please specify the Start and End dates for the duration of the expense.
- Enter the Amount of the expense.
- Provide the Reference Number for this expense.
-
- Bill Upload: You can upload the associated bill for the expense using this feature.
- Description: You have the option to include a detailed description for the expense to enhance clarity and context.
- Click on Save 💾 icon to save the expense.
-
Watch : How to bulk upload Expense.
To Upload Multiple Expenses in Bulk
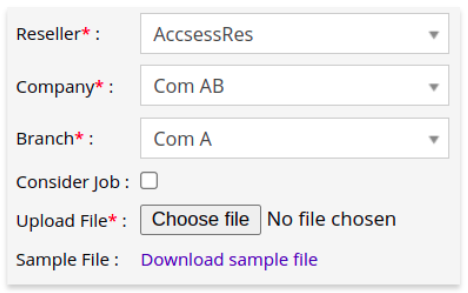
- Click on the Upload Excel button on the taskbar. A new window will open for the bulk upload process.

- Choose the appropriate Reseller, Company, and Branch from the dropdown menu under which you wish to add the expense.
- Consider Job: Select the checkbox if you wish to associate the expenses with a specific job. The procedure will continue as outlined previously.
- Download the sample file from the link given. The file will hold the basic information about the expenses. Fill in the details of expenses in the given format, and then Upload file by clicking on Choose File.
- Click on the Save 💾 icon to save the expenses.
To Download Multiple Expense Records
- Click on the download button on the taskbar.

- A file with an XLS extension gets downloaded.

- You may distribute this file to others or utilize it according to your requirements.
Watch : How to add expense from Live Tracking Screen.
To Upload Expenses from Live Tracking Screen
Expenses can also be conveniently added through the Tooltip widget on the Live Tracking screen, allowing users to add expenses for specific objects with ease.
- Log in to your account.
- Go to Tracking > Click on Object > Expense Widget on Tooltip.
- Click on the ➕ icon.
- Enter the details.
- Click on Save 💾.
The history of expenses for the selected object can also be viewed using this widget by clicking on the History button.
To add expenses from the mobile application, click here.
To download the expenses from the mobile application, click here.