Data Access for Company
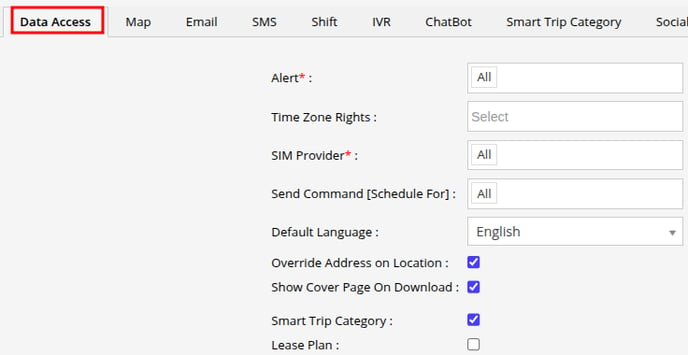
The Data Access screen is part of the system's settings module, which allows Admins or Resellers to customize data access and other preferences for Company users.
Watch : How to configure Data Access for Company
To Get Started
- Login to your account.
- Go to Settings > General > Company
- Double-click on the account for which you want to provide data access rights.
- Navigate to the Data Access tab.

- In the Alert field, you can choose the specific alerts that you want the reseller to access. This will enable the company to create alerts based on the rights you have granted.
- Company can be granted Multiple Time Zone rights, allowing them to manage various company accounts operating in different time zones.
- You can select the Sim Provider from the drop-down menu for which you wish to grant access rights to the company user. The company user will only have the ability to add the selected Sim providers while adding objects.
- From Send Command [Schedule For] you can select what scheduling right you want to give to the company for the send command screen.
- Select the Default Language from the drop-down list. This will be the language in which the company will have the analytics within the system.
- Check the Override Address on Location checkbox if you prefer to display the configured POI name on the platform instead of the location coordinates.
- If you want to have the cover page (Title Page) when you download the reports, then click on the checkbox to enable Show Cover Page on Download.
- The Smart Trip Category can be selected if you wish to grant rights to manage the trip categories within the Smart Trip application.
- Lease Plan: By enabling this option, users can access the Lease Plan feature for efficient lease management. This feature helps manage vehicle lease agreements by configuring details such as contract terms, mileage restrictions, and driver allocation, ensuring transparency, compliance, and reduced manual effort.
- Save the settings by clicking on the Save 💾 icon.
