Once the devices are added to the Admin account, they can be sold to the Reseller. The Reseller will then sell these devices to the Reseller Subuser, who will ultimately distribute them to the company users.
This document provides a comprehensive guide on the procedures for selling devices to both resellers and reseller subusers, as well as the registration process required for utilizing these devices to add objects.
Before Getting Started
Learn How to Add Devices to Your Inventory.
To Get Started
- Log in to the admin account.
- Go to Settings > Master > Inventory.
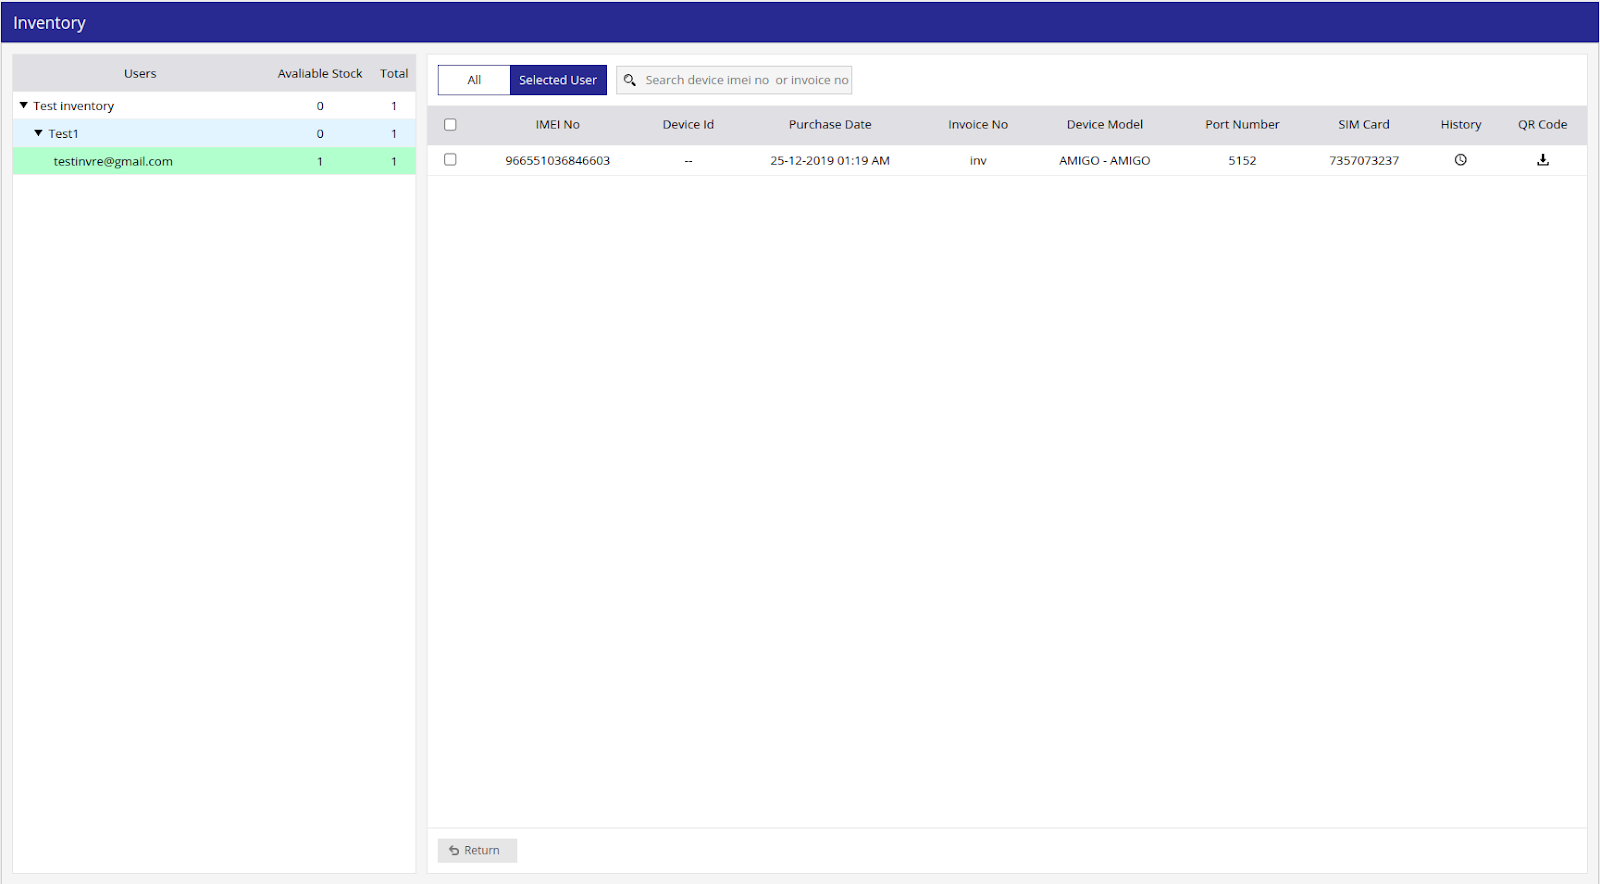
Upon clicking on Inventory, you will be directed to the Inventory Overview page, where you can have a look at all your device records.
To Sell the Device to Reseller
When an admin wants to sell the devices to the Reseller, the following steps need to be followed:.
-
Select the Admin user in the left panel to display the available device stock in the right panel.
-
Please choose the devices you wish to sell to the reseller.
.png?width=670&height=343&name=Frame%20654%20(88).png)
-
Click on the Sell button on the taskbar.
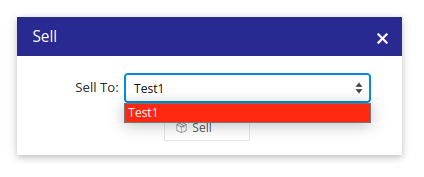
-
A new window will appear, allowing you to select the Reseller to whom you wish to sell the devices.
-
Once you have made your selection, click on the Sell button to complete the transaction, officially transferring the devices to the chosen reseller.
-
When you click on the admin account name, you will be able to view the reseller name, the available quantity of devices, and the total number of devices associated with the users.
-
In the right-side window, you will find the device details, including a comprehensive history of each device’s purchase and sale records.

To sell the devices to the Reseller Subuser
-
When you click on the admin account name in left-side panel and then select the reseller, you will be able to view the reseller subuser to whom the devices need to be sold.
-
To sell the devices to the Reseller subuser;
-
Choose the Reseller from the list provided.
-
Navigate to the right-side panel to select the devices from the available stock list and choose the devices you wish to sell.
-
Once the devices to be sold are selected, click on the Sell button.
-
Upon successful completion of the device sale, the number of available devices will be clearly indicated next to the Reseller Subuser's account on the left side of the screen for your easy reference.
-

To Return the Devices to the Admin/ Reseller
In the event that a device is found to be faulty or for any other reason, the Reseller or Reseller Subuser has the option to return the device back to its parent.
-
Click on the user whose device needs to be returned back to the superior user in the hierarchy, and you would be able to see the device details on the right side window.
-
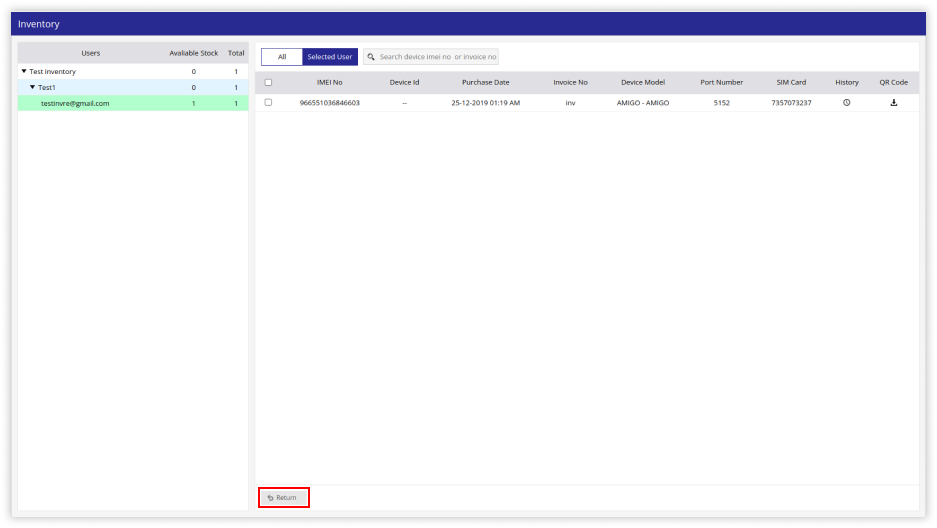
To initiate the return process, please select the device you wish to return from the list displayed in the right-side panel.
-
After selecting the devices, click on the Return button.
-
In the popup box, select the relevant Reason Type and provide additional details if necessary, then click on Return.
.png?width=371&height=244&name=Frame%20654%20(81).png)
-
Upon clicking the Return button, the devices will be reassigned to either the Reseller or Admin based on the established hierarchy. You will find these devices listed in the left-side panel under the appropriate user.
If an incorrect device entry occurs, you can easily remove the devices by utilizing the Delete Button located on the taskbar.
To Utilize this Device for Adding Objects
Once the device has been sold to the Reseller Subuser, they can effectively utilize the device to add the object and create a company account via the mobile application by entering the IMEI number.
To Download the QR Code
-
To utilize this device for object registration, you can use the downloadable QR code.
-
Select the admin account name and click on the reseller name to view detailed information about the reseller subuser, including the total number of devices allocated to them.
.png?width=670&height=451&name=Frame%20654%20(87).png)
-
When you click the download button, the QR code will be saved to your device. The Reseller Subuser will provide this QR code to the user to sign up for the mobile application.
-
To do so, you will need to download the mobile application from the Play Store or App Store.
Sign Up in Mobile Application
-
Open the mobile application.
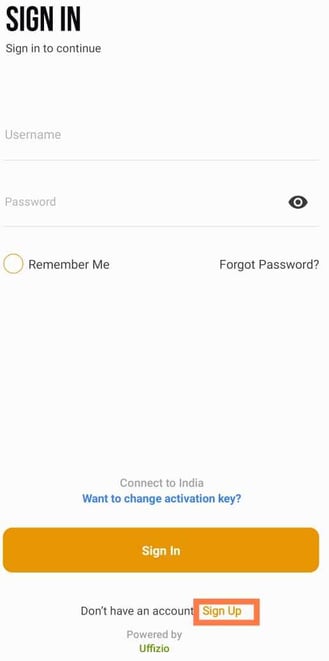
-
Enter Username that you want to use.
- Enter Password of your choice.
- Retype Password again.
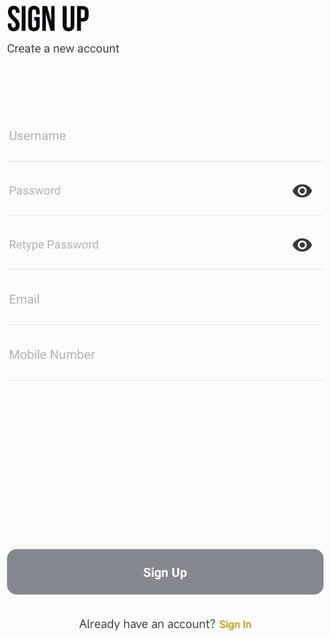
Please Note:
- Password must be of at least 8 characters.
- Password must contain at least one uppercase character (A-Z), one lowercase character (a-z), and one digit (0-9) and special characters from (!,@,#,$,%,&,*,?).
- Enter your Email address.
- Enter your Mobile Number.
- Click on Sign Up to create your account.
-
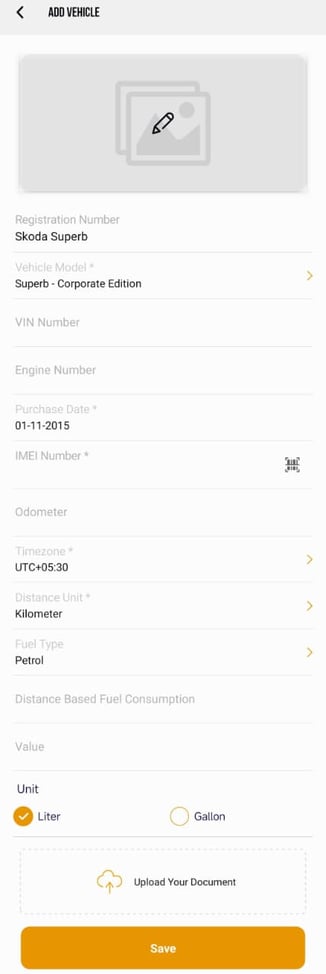
Once you have created your account, you now need to add the vehicle details.
- Click on the
 icon to upload vehicle photo
- Click on the
-
-
- Select Camera, if you want to click a photo through mobile's camera.
- Select Gallery, if you want to upload image from your phone's gallery.

- Registration Number: Provide the registration number of the vehicle.
-
Vehicle Model: Select your vehicle model from the list.
- VIN Number: Enter the vehice's VIN number.
- Engine Number: Enter the Vehicle's Engine Number
-
Purchase Date: Select the date on which the vehicle was purchased.
- IMEI Number: Enter the GPS device IMEI number.
- click on
 icon to scan the IMEI QR.
- click on
-
-
- Odometer: Enter the Vehicle Odometer reading.
- Timezone: select the timezone that is set on the device.
- Distance unit: Select the unit from Kilometer, Miles or Nautical miles that you prefer.
- Fuel Type:Select the fuel that the vehicle uses.
Please Note: Distance based fuel Consumption, Value & Unit these three are used to estimate the amount of fuel consumed by the vehicle based on the distance it travels.
-
- Distance Based Fuel Consumption: Provide the distance the vehicle travels.
-
- Value: write the fuel consumption done for the distance travelled.
- Unit: Select the unit of fuel from Liter or Gallon.
-
Click on Save to save the vehicle configuration.
- After clicking on Save you will enter the appliation.