
Users can set up a schedule for report downloads, which automates the process and eliminates the need for daily manual downloads and streamlines their workflow.
To create a Schedule Report, go to Reports > Click on  as highlighted in the below-given image.

After clicking on , the tab will open on the right side of the screen, as shown below.
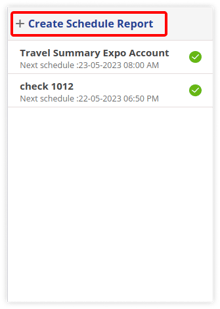
To create a Schedule Report, click on + Create Schedule Report. The following window will open on the right side of the screen:
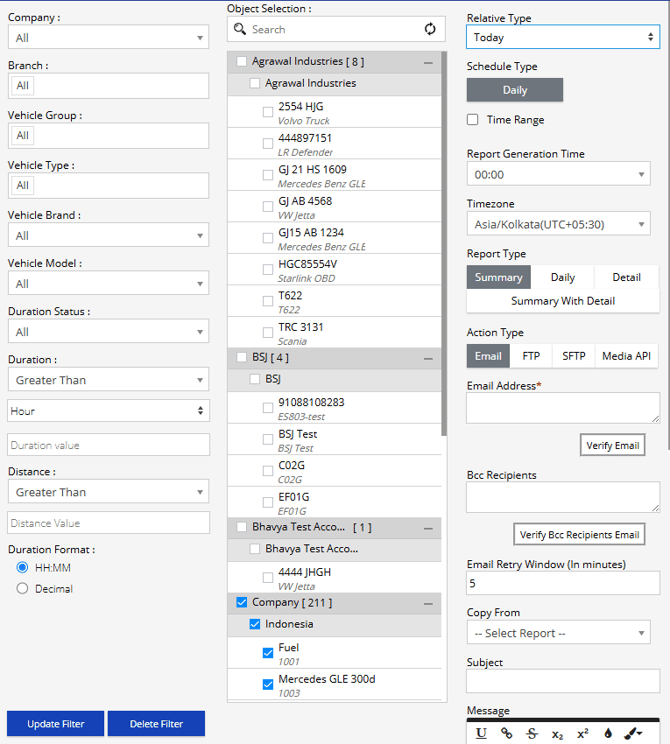
To Schedule a Report
Follow the steps to configure the schedule report.
- Relative Type: Select the time period for which the report should be generated.
- Today: Generates the report using data from the current day.
- Yesterday: Generates the report using data from the previous day.
- This Week: Includes data from the beginning of the current week up to the present day.
- Schedule Type: select the days on which the report is to be generated.
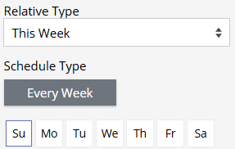
- Schedule Type: select the days on which the report is to be generated.
-
- Last Week: Includes data from the previous calendar week.
- Schedule Type: select the days on which the report is to be generated.
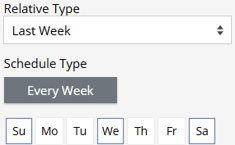
- Schedule Type: select the days on which the report is to be generated.
- Last 7 days: Includes data from the last seven days, including the current day.
- Schedule Type: select the days on which the report is to be generated.
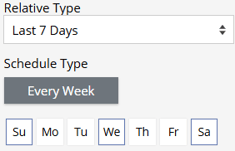
- Schedule Type: select the days on which the report is to be generated.
- Last Week: Includes data from the previous calendar week.
-
- This Month: Includes data for the current month.
- Schedule Type: select the days on which the report is to be generated.
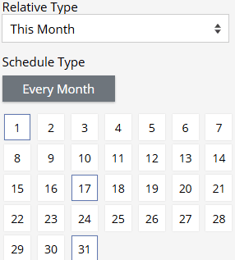
- Schedule Type: select the days on which the report is to be generated.
- Last Month: Includes data from the previous calendar month.
- Schedule Type: select the days on which the report is to be generated.
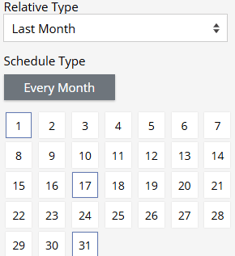
- Schedule Type: select the days on which the report is to be generated.
- This Month: Includes data for the current month.
- Time Range: Enable this option to generate the report for a specific time range instead of the entire 24 hour period.
- Report Generation Time: Specify the time at which the system should automatically generate the scheduled report.
- TimeZone: Select the timezone that will be used for report generation and scheduling. The report is generated according to the selected timezone.
- Report Type: Select the format in which the report should be generated.
- Summary: Generates a summarized version of the report containing key information.
- Daily: Generates the report with day-wise records for the selected period.
- Detail: Generates a detailed report containing all available records and information.
- Summary with detail: Generates a report that includes both a summary and detailed records.
Please Note: The daily option is only available for Travel report.
- Action Type: Select the method through which the generated report will be delivered.
-
Email
-
Please Note: Email API configuration is required.
-
-
- Email Address: Enter one or more recipient email addresses where the report should be delivered. Multiple email addresses can be specified, separated by commas.
- Verify Email: Click to validate the entered email address(es) before saving the schedule.
- Bcc Recipients: Enter one or more email addresses to receive a blind carbon copy (Bcc) of the report. Multiple email addresses can be specified, separated by commas.
- Verify Bcc Recipients Email: Click to validate the entered email address(es) before saving the schedule.
- Email Retry Window: Specify the time interval for retrying report delivery if the email fails to send. The system will attempt to resend the email within the configured retry window.
- Copy From: Select an existing report schedule to copy its email configuration.
- Message: Enter the email message that will be included along with the scheduled report.
- File Format: Select the format in which the report should be generated.
- XLS: Generates the report in Excel format.
- PDF: Generates the report in PDF Format.
- CSV: Generates the report in Comma-Separated Values format.
- Report Name: Enter a name for the scheduled report.
- Advance Configuration: Click to expand and configure additional option for report.
- Save: Click to save the report schedule with the configured settings.
- Cancel: Click to discard the changes and close the report scheduling window without saving.
- Email Address: Enter one or more recipient email addresses where the report should be delivered. Multiple email addresses can be specified, separated by commas.
-
FTP
- Host Address: Enter the hostname address of the FTP server where the generated report will be uploaded.
- Port: Specify the port number used to establish the FTP connection.
- Username: Enter the username required to authenticate with the FTP server.
- Password: Enter the password associated with the specified FTP account.
- Folder Name: Specify the destination folder on the FTP server where the report will be uploaded.
- File Format: Select the format in which the report should be generated.
- XLS: Generates the report in Microsoft Excel format.
- PDF: Generates the report in PDF Format.
- CSV: Generates the report in Comma-Separated Values format.
- Report Name: Enter a name for the scheduled report. This name is used to identify the report and is also applied to the generated report file.
- Advance Configuration: Click to expand and configure additional option for report.
- Save: Click to save the report schedule and enable report delivery via FTP.
- Cancel: Click to discard the changes and close the configuration window without saving.
-
SFTP
- Platform: Select the cloud storage platform where the generated report will be uploaded. Currently, Amazon S3 & Azure are supported.
- Access Key ID: Enter the Access Key ID associated with your Amazon S3 account.
- Secret Access Key: Enter the Secret Access Key corresponding to the provided Access Key ID.
- Region: Specify the AWS region where the target S3 bucket is hosted.
- Bucket Name: Enter the name of the Amazon S3 bucket where the generated report will be uploaded.
- File Format: Select the format in which the report should be generated.
- XLS: Generates the report in Microsoft Excel format.
- PDF: Generates the report in Portable Document Format.
- CSV: Generates the report in Comma-Separated Values format.
- Report Name: Enter a name for the scheduled report. This name is used to identify the report and is also applied to the generated report file.
- Advance Configuration: Click to expand and configure additional option for report.
- Save: Click to save the report schedule and enable report delivery to the configured Amazon S3 bucket.
- Cancel: Click to discard the changes and close the configuration window without saving.
-
Social Media API
The Social Media API action type allows users to deliver scheduled reports through supported messaging platforms. Currently, the platform supports WhatsApp and Telegram.
- Gateway: Select the messaging platform through which the scheduled report should be delivered. Available options include:
- WhatsApp: Sends the scheduled report to the specified WhatsApp recipient(s).
- Telegram: Sends the scheduled report to the specified Telegram chat.
- Recipient Number (WhatsApp): Enter the recipient's WhatsApp number, including the country code (for example, +91XXXXXXXXXX). Multiple recipient numbers can be entered by separating them with commas, if supported.
- Telegram Chat ID (Telegram): Enter the Telegram Chat ID of the user or group where the scheduled report should be delivered.
- File Format: Select the format in which the report should be generated.
- XLS: Generates the report in Microsoft Excel format.
- PDF: Generates the report in Portable Document Format.
- CSV: Generates the report in Comma-Separated Values format.
- Report Name: Enter a name for the scheduled report. This name is used to identify the report and is also applied to the generated report file.
- Advance Configuration: Click to expand and configure additional report scheduling and delivery settings, if required.
- Save: Click to save the report schedule and enable report delivery through the selected messaging platform.
- Cancel: Click to discard the changes and close the configuration window without saving.
- Gateway: Select the messaging platform through which the scheduled report should be delivered. Available options include:
-