
The Company option in the mobile application allows users to create and manage company accounts directly from their smartphones. Users can enter company details, configure settings, and save the company information without accessing the web platform.
To Get Started
- Login to the Mobile application using your credentials.
- Go to the Settings
 screen.
 - Click on Company.
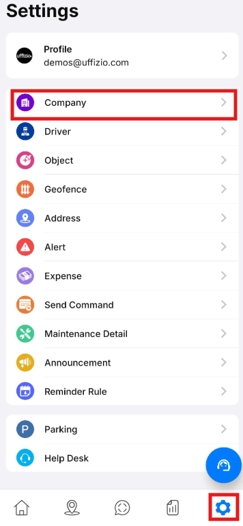
Please Note: After selecting the Company option , user will be directed to the Company overview screen, where you can manage all existing company.
To Add Company
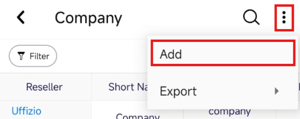
- Click on the
 icon on the top right corner of the screen.
 - Click on Add.
-
Navigate to My Account
- Select a Reseller from the drop-down under which you want to create the company account.
-
Please Note:
The Reseller Dropdown is displayed only when a company is created from an Admin account. If the company is created from a Reseller account, the dropdown will not appear.
-
-
- Select the Country & State from the drop down.
- Add the Short Name of the company.
- Add the Username & Confirm Username for the company account. Use an email address as a user name.
- Add a Password for the company user.
- Retype the password.
- Define the duration of Data Storage for the company. This period determines the number of days the company can access and analyze data on the platform. For example, if set to 90 days, the company will have access to analytics for the past 90 days.
-
Navigate to User Settings
- Enter the preferred Time Zone from the predefined options. The chosen timezone will be utilized to present analytics for the company account within the application.
- Select the preferred Date format.
- Select the preferred Time format.
- Select the Week Start Day. The application will produce weekly reports based on the start day of the week that has been configured on your company account.
- Select a default Unit of Distance from the drop-down list. The system will use this distance unit to display the distance consistently across all sections of the application.
- Select the preferred Preferred Currency Unit based on the company's location. The system will use this currency unit to display currency information throughout the application.
- Select the Unit of Fuel from the drop-down list. The system will use this fuel unit to display the fuel analytics on the application.
- Select Fuel Economy Scaling from the drop-down list. This will be used to display mileage on Fuel Economy Report.
- Select the Default Tire Pressure Unit based on your company's standards. The system will use this unit to display tire pressure information throughout the application.
- Click on the Save 💾 icon.
-
Navigate to Screen Access.
- Copy from Group: select the user from which the screen rights are to be copied.
- Click on the Save 💾 icon.
-
Please Note: At least one company must be created through the web application before creating a company using the mobile application. The newly created mobile company inherits its screen access rights from an existing company created on the web platform.
-
-
Navigate to Data Access.
- In the Alert field, you can choose the specific alerts that you want the reseller to access. This will enable the company to create alerts based on the rights you have granted.
- You can select the Sim Provider from the drop-down menu for which you wish to grant access rights to the company user. The company user will only have the ability to add the selected Sim providers while adding objects.
- From Schedule For you can select what scheduling right you want to give to the company for the send command screen.
- Click on the Save 💾 icon.
-
Navigate to Documents
- Tap on the + Icon to add the document related to company.
- Document Name: Enter a name to identify the document.
- Issue Date: Select the date on which the document was issued.
- Expiry Date: Select the date on which the document expires.
- Attachment: Upload the relevant document or image associated with the record. Supported file types depend on the platform configuration.
- Apply: Tap on apply to save the document.
- Tap on the + Icon to add the document related to company.
-
- Click on the Save 💾 icon to create the company.