Admins can upload holiday records one by one or in bulk at once. With all holiday records in a digital format, school authorities can easily access and organize important information, saving time and resources compared to traditional manual record-keeping. This streamlines the process, ensuring accurate holiday schedules are maintained efficiently.
To get started
- Login to your account.
- Go to Settings > Master > Holiday.
The page you land on is the holiday overview page where you can have a look at all the holiday records.
To upload records individually
-
Click on the ➕ button on the taskbar.

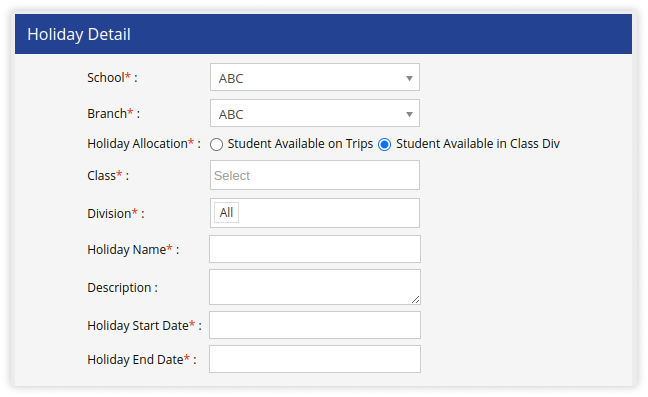
Navigate to Profile
-
- Select the School from the dropdown list.
- Select the Branch from the dropdown list.
- Select the Holiday Allocation from the dropdown list.
- Enter the Class as asked.
- Select the Division from the dropdown list.
- Select the Holiday Name from the dropdown list.
- Select the Description from the dropdown list.
- Enter the Holiday Start Date as asked.
- Enter the Holiday End Date as asked.
-
- Save the details by clicking on the Save 💾 Icon.
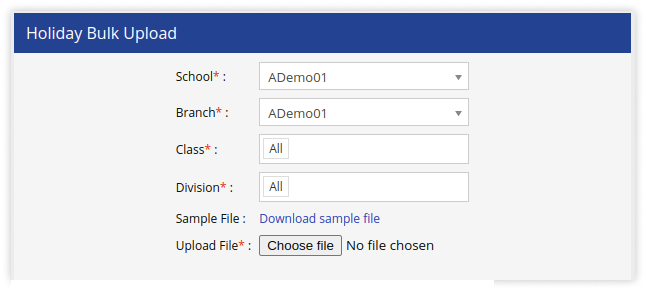
To upload multiple records
-
Click on the Upload button on the taskbar.
- Select the School from the dropdown list.
- Select the Branch from the dropdown list.
- Select the Class from the dropdown list.
- Select the Division from the dropdown list.
- Download the sample file from the link given. The file will hold the basic information about the holiday.

- Upload the XLS file with after filling up the details.
- Click on the save 💾 icon.