
An API (Application Programming Interface) serves as a bridge that allows different software applications to interact and exchange data effectively.
A customized API empowers users to access and retrieve report data available on the platform, facilitating seamless sharing with third-party applications.
This document explains how to configure and use the customized API module in our software.
Please Note: The User Customize API feature is available only to users with the Premium version of the platform.
Watch : how to configure user customize API.
To Get Started
- Log in to your account.
- Go to Settings > Master > User Customize API.
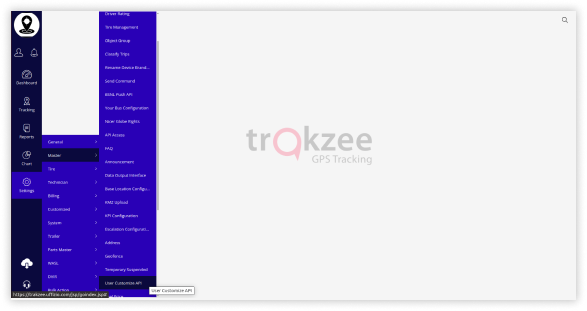
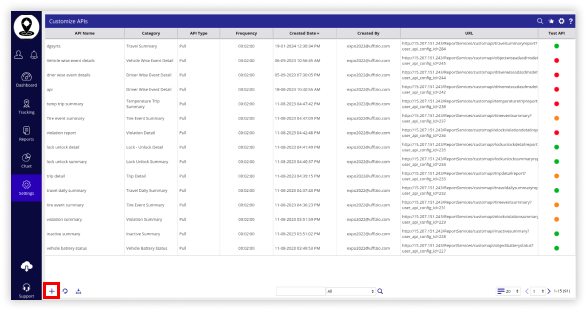
- Click on the + button.
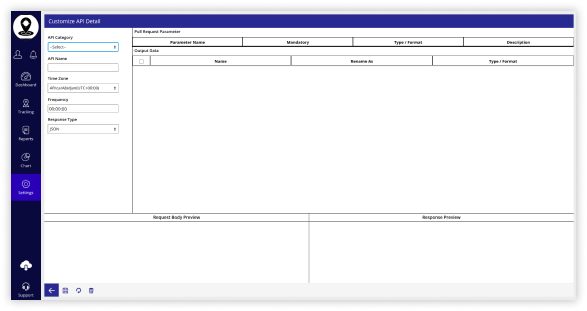
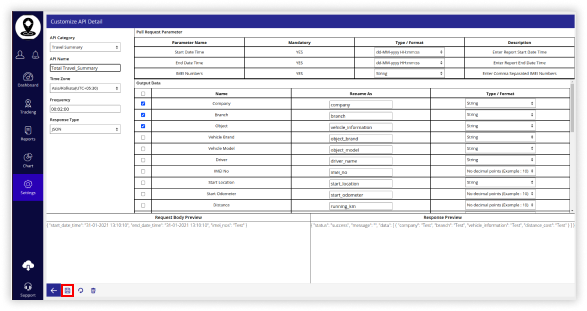
- Choose the report name from the API Category list that corresponds to the data you wish to share.
- Enter API Name.
- Select Timezone from the list: The data will be shared according to the selected timezone.
- Enter Frequency Time.
The minimum interval for making requests is set at 2 minutes per call. This means that after a request is made, you must wait at least 2 minutes before initiating the next request.
- Select Response Type.
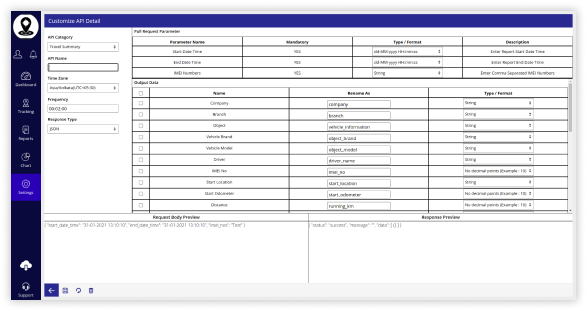
- Select the Pull Request Parameters Type/Format according to your requirements.
- Select Start Date Time format from the predefined list.
- Select End Date Time format from the predefined list.
- The default format for IMEI Numbers is String.
- Choose the Output Data fields you wish to include by checking the corresponding checkboxes next to each field name.
- Enter a custom field name in the Rename As column next to the fields you have selected, based on your specific requirements.
- Choose the appropriate Type / Format from the options available next to the fields you have selected, tailored to meet your specific needs.
- The changes after you add the fields would be visible in the Request Body Preview and Response Body Preview.
- Click on the Save 💾 icon to save the configuration.
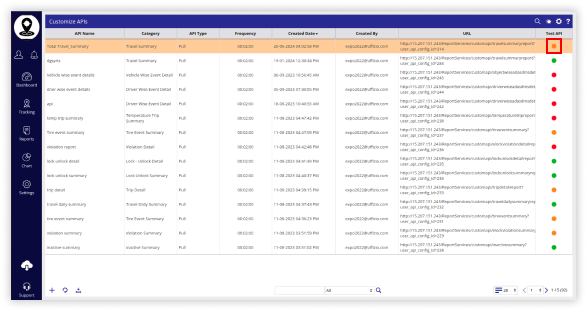
To Test the API
- Go to Settings > Master > User Customize API.
- Click on the Orange Dot in the Test API column of the API that needs to be tested.
- A dialog box will appear, prompting you to enter the parameter values for the Test API request.
- Enter Start Date Time.
- Enter End Date Time.
- Enter IMEI Numbers.
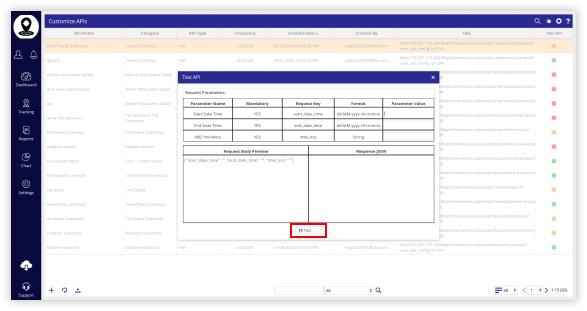
Please Note: For APIs that require both a Start Date and an End Date, please be aware that the maximum allowable date range for selection is 10 days.
-
- Click on Test to test the API.
Below is a description of the various color-coded Test API dots you will encounter on the Overview screen, along with their corresponding meanings:
- Orange: The test is pending and has not yet been conducted.
- Green: The test is successful.
- Red: The test has failed due to a specific reason, which you can identify by hovering over the dot for further details.
To Integrate the API
Please Note: The User Customized API is designed to be accessible by all users under the admin account. To use the API, you must first generate a token specific to your user account. Once the token is generated, it enables access to the API for retrieving data related to the vehicles associated with the user account for which the token was created.
Step 1: Generate a token for the specific user account.
-1.png?width=688&height=250&name=Frame%20666%20(4)-1.png)
Step 2: Use the generated token in the header to access the configured API and retrieve the required data.
-1.png?width=688&height=109&name=Frame%20666%20(5)-1.png)
-1.png?width=688&height=324&name=Frame%20666%20(6)-1.png)