
The Geofence Bulk Upload feature enables users to create multiple geofences in a single operation using a predefined Excel template. Instead of manually adding each geofence, users can upload geofence details in bulk, reducing configuration time and ensuring data consistency across the platform.
This feature is ideal for organizations that need to configure a large number of customer locations, warehouses, branches, delivery points, restricted zones, or operational areas.
To Get Started
Users can easily add Geofence in bulk using different options on the platform:
Watch: How to bulk upload Geofence.
To Create Geofence in Bulk
-
To Create Geofence in Bulk
- Click on the Upload button on the taskbar.
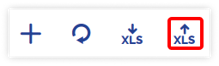
-
- Select the Reseller, Company and Branch under which you want to create the geofence from the drop-down menu.
.png?width=342&height=196&name=Frame%20658%20(10).png)
- To upload a file, first you need to download the sample file from the given link. Fill in the details of geofence like type, name, category, geofence coordinates, description, tolerance and radius in the given format and then Upload the file by clicking on Choose file.
- Click on the Save 💾 icon.
- Select the Reseller, Company and Branch under which you want to create the geofence from the drop-down menu.
- Click on the Upload button on the taskbar.
To Bulk Upload Address from the Live Tracking Screen
Navigate to KML/KMZ
-1.png?width=256&height=588&name=Frame%20658%20(4)-1.png)
- Select the Reseller and Company from the drop-down list.
- Select the Category of the geofence from the drop-down list.
- Select the appropriate Geofence Access option to define the visibility and accessibility of geofences for users:
- Public: Choose this option if the geofence should be visible to all users.
- Private: Choose this option to ensure the geofence is visible only to the user who created it.
- Select the Geofence Group from the drop-down list to categorize the geofence based on its type or specific use case. If no suitable group exists, you can create a new one.
- Choose the appropriate Geofence Type from the dropdown list, or if the desired type is not available, you have the option to create a new one.
- Enter the Contact No of the responsible authority of that area.
- Provide the specific Address of the geofence location.
- You can assign different colors to the geofence for easy identification by type or use case. Select the color from the Color Picker.
- Upload the KML/KMZ file by clicking on Choose File.
- Click on the Save 💾 icon.
Navigate to Excel/XLS
-1.png?width=313&height=351&name=Frame%20658%20(7)-1.png)
- Select the Reseller and Company from the drop-down list.
- Select the Geofence Group from the drop-down list to categorize the geofence based on its type or specific use case. If no suitable group exists, you can create a new one.
- Download the sample file from the given link. Fill in the details of geofence, like type, name, category, geofence coordinates, description, tolerance, and radius, in the given format, and then upload the file by clicking on Choose File.
- Click on the Save 💾 icon.
Users can also download geofence details according to their preferences.