
The system provides users with easy access to trailer records, facilitating the effective management of trailers and allowing for the direct assignment of vehicles to these trailers from the live tracking screen.
On the left side of the screen, we have a listing window, which displays the trailer details in one place.
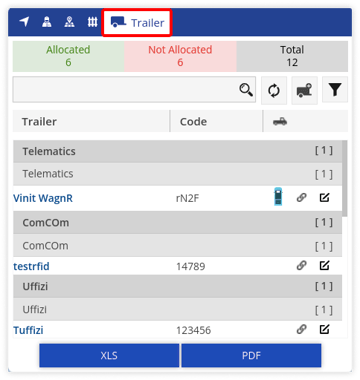
To view the trailer tab, navigate to Live Tracking > Listing Panel > Trailer tab.
It consists of the following features and details:
Trailer Status Bar
Trailer status is displayed in a color-coded form on the trailer status bar.

Below given are the color codes:
| Allocated The trailers that are allocated to particular objects fall under this category. |
|
| Not Allocated The trailers that are not allocated to objects fall under this category. |
Search Bar
From here, a user can perform actions on the trailers.

Below given are the actions that can be performed:
- Search Box: Using the search box, the user can easily search the specific trailers.
- Add Trailer: By clicking on the add trailer button, the user can add trailers directly from the Live Tracking Screen. To learn how to add a trailer, click here.
- Filter: The user can filter trailers on the basis of Company, Branch or Trailer Group using the Filter option.
Trailer Information
All the trailer information can be viewed here in one place.
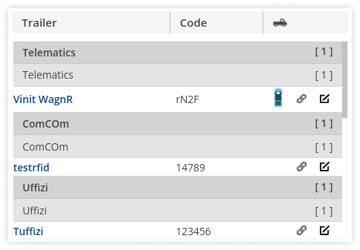
Following is the type of information that can be viewed in the trailer information list:
- Trailer Name: The name of the trailer will be displayed.
- Trailer Code: The code of the trailer will be displayed.
- Vehicle Name: The vehicle assigned to the trailer is displayed. By clicking on the vehicle, the tooltip of that vehicle will appear on the screen.
- Assign Trailer: By utilizing this option, users can efficiently allocate or deallocate a trailer to the corresponding object.
- Edit Trailer: The user can edit the trailer details by clicking on the Edit icon.
Download Trailer Information
All the trailer information can be downloaded in XLS format or in PDF format.
