In the software, a Branch refers to a location or a physical site of a Company. For example, if a Company has multiple offices or warehouses in different locations, each of these locations can be considered a branch in the software.Users using the software can set up and manage multiple branches inside a single Company account, which is useful for businesses with a functional organizational structure or those who perform business in various regions.
To get started
- Log in to your admin account.
- Go to Configuration→Branch Entity Overview.
To add a New Branch
- Click on the ➕ icon on the taskbar below.

To Create the Branch
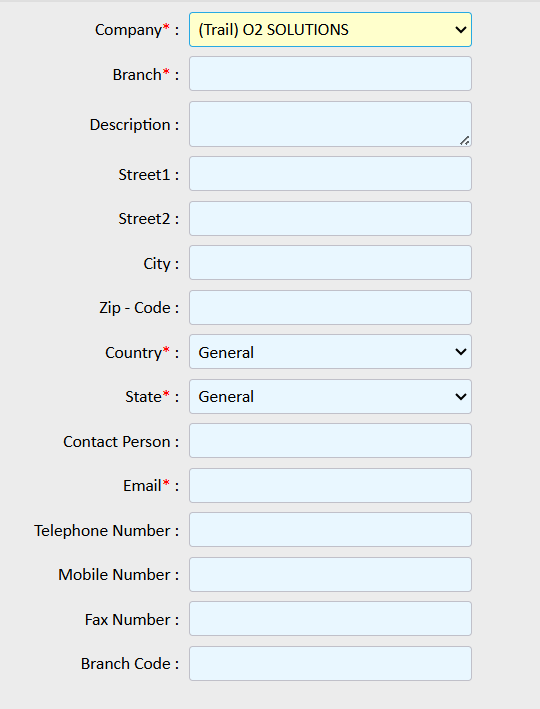
- Company*:
- From the dropdown list, choose the company under whom this branch will be created.
- Branch*:
- Enter the name of the Branch you want to be used for this branch.
- Description:
- You can enter additional notes in description of this barnch.
- Address of the branch:
- You can enter the address of the branch, by adding below details:
- Street 1
- Street 2
- City
- Zip Code
- You can enter the address of the branch, by adding below details:
- Country*:
- From the dropdown list, choose the country where this branch is located.
- State*:
- From the dropdown list, choose the state where this branch is located.
- Contact Person:
- Enter the name of the contact person who is responsible for this branch.
- Email*:
- Enter the mail id used by the branch person
- Telephone number:
- Enter the telephone number of the branch.
- Mobile number:
- Enter the mobile number of the branch.
- Fax Number:
- You can enter the fax number of the branch.
- Branch Code:
- You can enter the Identification code of the branch.
Click on the Save 💾 button