
This feature allows users to draw barriers on the floor map to restrict or control movement within the indoor area. Click on the map to mark the barrier path by adding points. Once saved, the barrier acts as a virtual boundary to prevent entry or define restricted movement paths.
To efficiently Draw Zone on Layers, please follow these outlined steps.
To Get Started
- Log in to your account.
- Go to Settings > Master> Layers.
Please Note: Upon clicking on Layers, users will be directed to the Layers Overview page, where they can easily view and manage all Layers records.
To Add Layers
- Click on the ➕ button on the taskbar.

- Select the Company under which the floor plan is located.
- Select the Branch under which the floor plan is located.
- Select the Building under which the floor plan is located.
- Select the Floor of the building to load the floor plan.
Please Note: Once details are selected the floor plan will load up on the screen.

- Click on the Draw barrier
 icon available on the top right corner, to draw a barrier on the Floor Map.
- The barrier is created in a polygon format. Click on the desired locations on the floor map to start drawing the barrier boundary. Continue adding points as needed, and connect the last point to the first point to complete and save the barrier.
Please Note : The Default colour of the zone is Red.
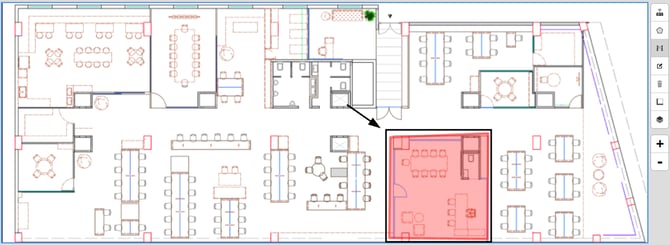
- Click on the Save 💾 icon to save the configuration.
Edit Barrier
- Log in to your account.
- Go to Settings > Master> Layers.
Please Note: Upon clicking on Layers, users will be directed to the Layers Overview page, where they can easily view and manage all Layers records.
- Double click on the record you want to edit.
- The Floor plan will open.
- Click on the Edit
 Icon.
Icon.
Please Note: Draw Barrier option needs to be deselected.
- The Polygon will appear on the created barrier, click and drag the polygon box to change the barrier according to your reference.
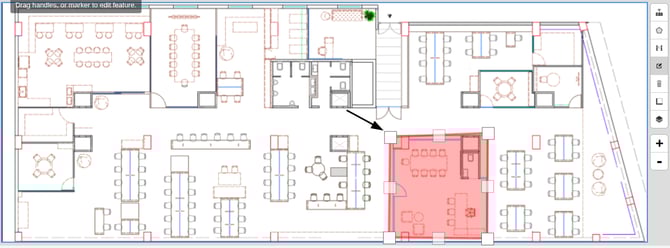
- Click on the Edit Icon to remove the polygon box.
- Click on the Save 💾 icon to save the configuration.